How to Migrate WordPress to Cloudways | Under 20 Minutes
Hey there! Ready to learn how to move your WordPress website over to Cloudways? Great news! I’m here to guide you through using the free WordPress Migrator Plugin. It’s super handy, trust me.
Whether you’re on Cloudways Flexible or Autoscale, this tutorial’s got your back. Oh, and if you’re running WooCommerce applications, no worries! You can use the same plugin to migrate those too.
So, let’s dive in and get this migration process started!
Migrate WordPress to Cloudways
If you want a video guide instead of reading this article, you can watch this video tutorial to migrate your WordPress website to Cloudways from any host.
What You Need to Migrate to Cloudways
Before we jump into the migration process, there are a few things you’ll need to have in place. Let’s go over them quickly to make sure you’re all set to get started.
Make sure you have the following:
- A Cloudways account.
- Admin access to your current WordPress website hosted on another hosting provider.
Now, please choose your platform:
- Cloudways Flexible
- Cloudways Autonomous
Since September 2022, I’ve been relying on Cloudways to power my blog. I’m thrilled to share that I wholeheartedly recommend Cloudways to my readers because I’m not just a customer – I’m a proud user. Avail my coupon DCRAFT15 for 15% off for Cloudways
Start With Cloudways Flexible
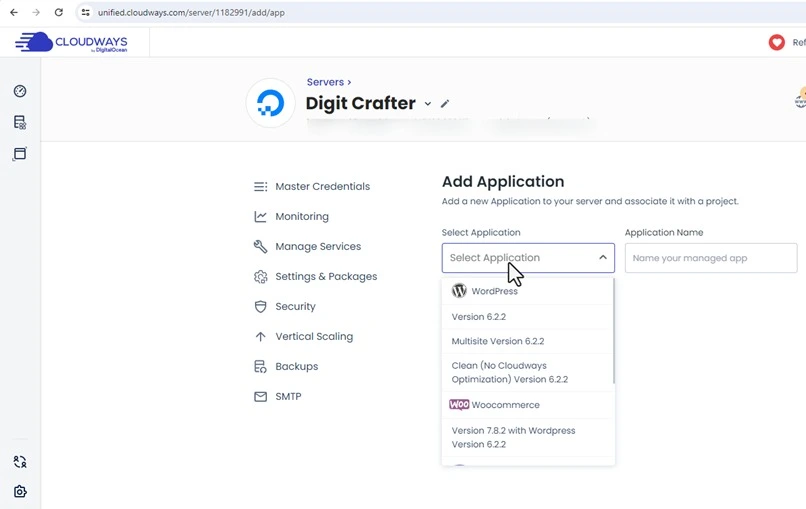
Step 1 — Launch an Application on Cloudways
So, here’s what we’re going to do: I’ll help you set up a WordPress application on the Cloudways Platform. This app will be where we’ll test out your migrated website.
Now, you have two options: You can either launch a new WordPress application on a fresh server or use an existing server. In our case, let’s say we’ve gone ahead and set up a WordPress Application on a server we already have, and we’ve called it ‘Digit Crafter’. Easy, right?
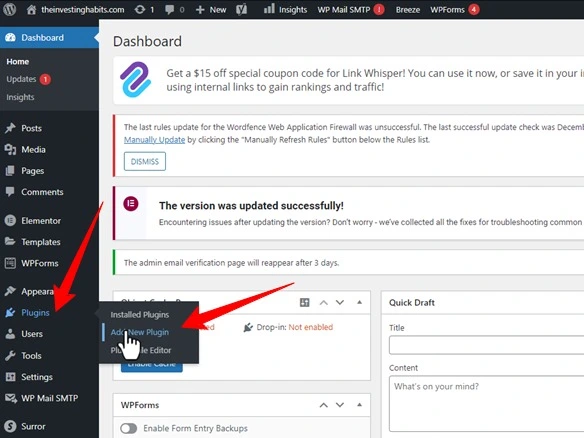
Step 2 — Install WordPress Migrator Plugin
Alright, now it’s time to get the Cloudways WordPress Migrator Plugin installed on your current WordPress site, let say your website is hosted on GoDaddy. Here’s what you need to do:
1. Head over to your WordPress admin panel in GoDaddy Hosting.
2. Log in using your credentials.
3. Select Plugins.
4. Click Add New Plugin.
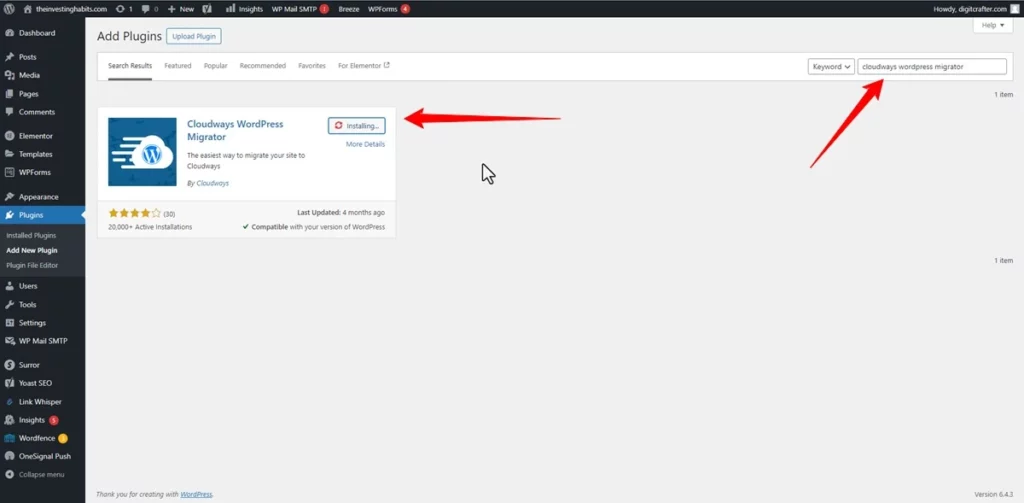
5. Look for the plugin by typing “Cloudways WordPress Migrator” into the search bar.
6. Once you’ve found it, click on “Install Now”.
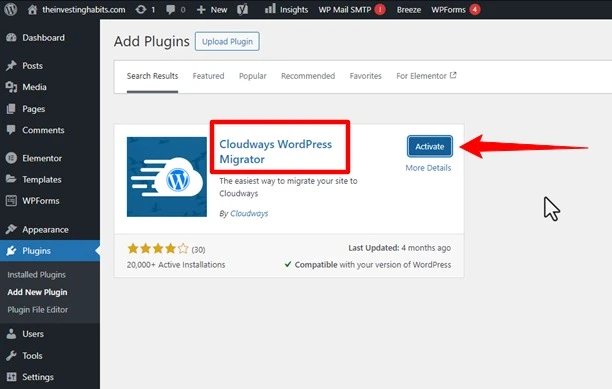
7. Once the plugin is installed, click on Activate.
Step 3 — Start Migration
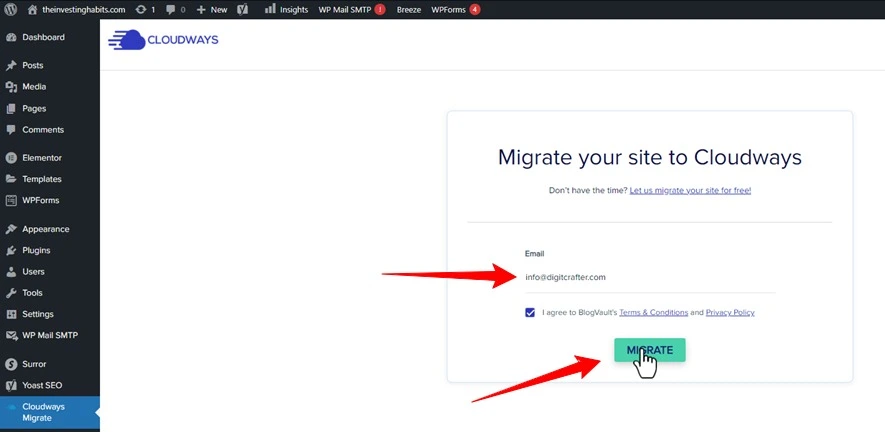
Alright, let’s start the migration process! Here’s what you need to do:
1. Enter your email address.
2. Agree to the terms & conditions and privacy policy.
3. Click on “Migrate”.
Alright, now it’s time to enter the necessary details to start the migration:
4. Choose your Platform: Cloudways Flexible or Autonomous.
5. Enter your Destination Site URL. This is the URL of the application you launched on Cloudways earlier.
6. Provide your SFTP Host/Server Address. This is your Cloudways server’s IP address.
7. Lastly, input your Database Name.
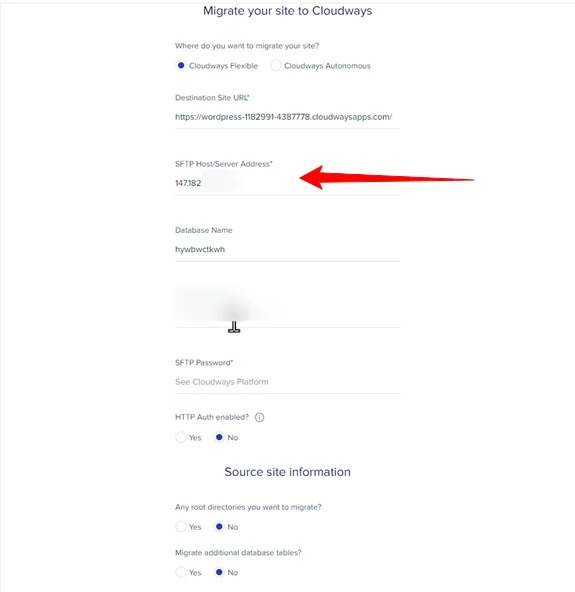
8. Next, enter your SFTP Username. Your SFTP username is your Master username.
9. Enter your SFTP Password. This is your master user’s password.
10. Under “HTTP Auth enabled?”, select No as we have not set up any password to visit the Cloudways-hosted application. If your Cloudways-hosted site is restricted and password-protected, select Yes and enter the username and password.
11. Under “Any root directories you want to migrate?”, select Yes if you also want to migrate your custom non-WordPress directories present in the public_html directory. Otherwise, select No if you don’t wish to migrate your custom directories.
12. Under “Migrate additional database tables“, select Yes if you also want to migrate any additional database tables and then mark them, else select No.
13. Under “Is this site protected?”, select No if your current WordPress website on another host is not restricted and is not password-protected. If it is password-protected, then select Yes and enter the username and password.
14. Finally, click Migrate.

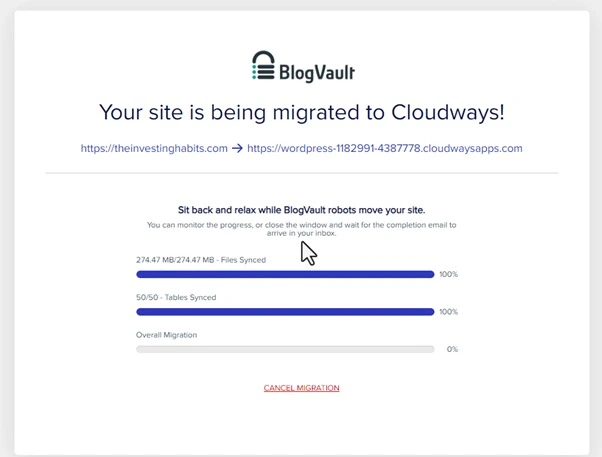
There you go! The migration has started smoothly. The time it takes depends on how much data needs to be moved.
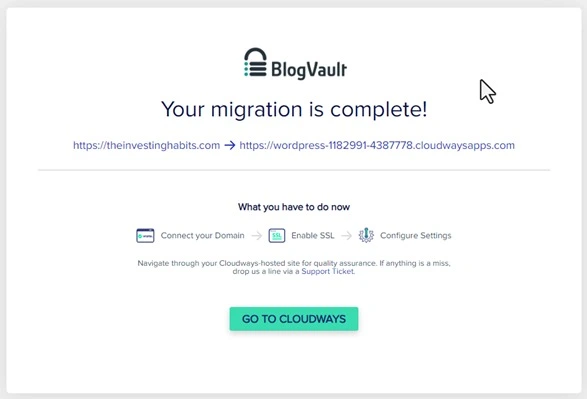
Step 4 — Test Your Migrated Site
Once the migration is finished, you can test your site by clicking “Go to Cloudways” or by directly visiting your Cloudways-hosted application. Keep in mind that your Cloudways-hosted application will have new WP-admin credentials available on the Cloudways Platform.
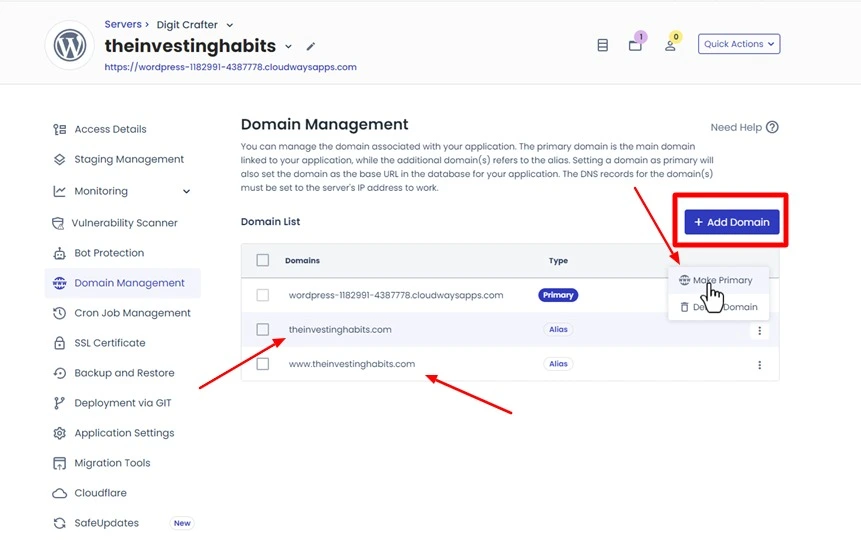
Step 5 — Add Your Domain
Now go to the domain management section in your Cloudways Account to connect your domain.
Let me show you how you can connect your domain to your new migrated website.
1. Update A record in your domain DNS record with new IP assigned by Cloudways for your migrated website, in my case it is Cloudflare
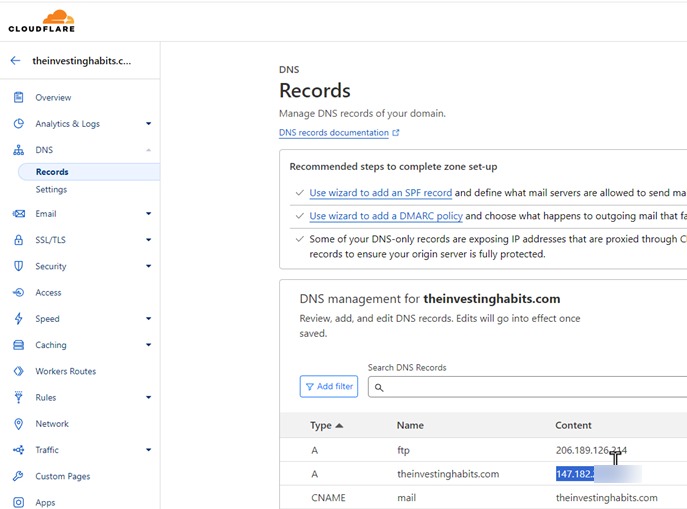
2. Click on Add Domain and add your both domain version i.e. with www and without www.
3. Set your default domain as primary.
Step 6 — Install SSL Certificate
In this step, you need to install SSL certificate for your website migrated to Cloudways. Here is how you can do it.
1. Click on SSL Certificate.
2. Under SSL Management enter your email, Domain name (with and without www version).
3. Click on Install Certificate.
4. After successfully installed, you will get expiration date of SSL Certificate.
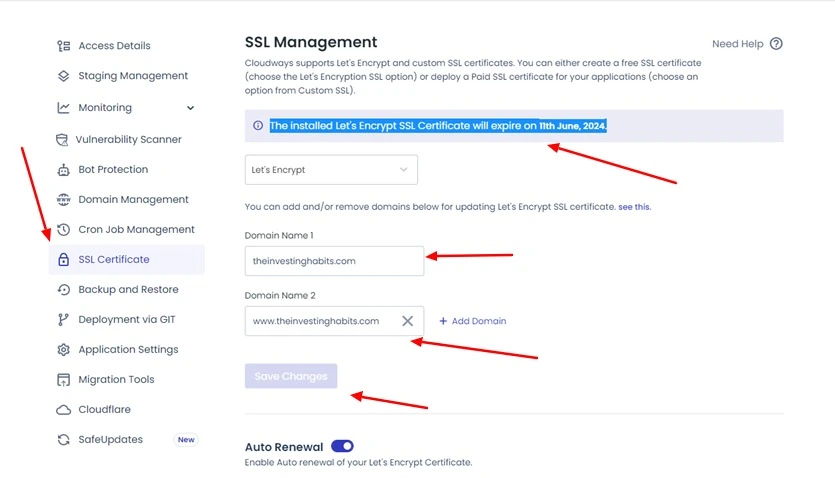
Your SSL certificate is successfully installed now.
Now you can check your domain that you have connected with your migrated website. Your website is successfully migrated to Cloudways.
To check and verify your migrated website, check its DNS record by using an online tool.
If you need any assistance, please let me know in the comments below.
Affiliate Disclosure:
This blog may contain affiliate links. If you click on an affiliate link and make a purchase, I may earn a commission. This does not affect the price you pay. I only recommend products and services I tested and believe will benefit my readers.