
If you’re struggling with indexing and ranking your website pages, this technical SEO checklist can help you identify and resolve issues that are hindering search engines from crawling, indexing, and ranking your site’s content.
There are three primary types of SEO: technical, on-page, and off-page. On-page SEO focuses on content-related factors that you have control over, while technical SEO primarily deals with your website’s structure and other behind-the-scenes aspects.
What is Technical SEO Checklist
This checklist provides a comprehensive guide for optimizing your website from a technical SEO perspective. Technical SEO involves understanding how search engines perceive your site, identifying the factors they use to rank your site, and implementing changes to improve your site’s visibility.
Bookmark this technical SEO checklist so you can easily refer back to it as you complete each task. Let’s dive into the checklist and get started optimizing your site for search engines.
Ultimate Technical SEO Checklist 2023
While some of the tasks in this to-do list may not be directly related to technical SEO, they can still have an indirect impact on your site’s search engine optimization. By following this technical SEO checklist, I was able to attract over 179K users to my website.
It’s worth noting that optimizing your website for search engines is an ongoing process, and it may take time to see significant results. However, by implementing the recommendations in this checklist, you’ll be well on your way to improving your site’s visibility and attracting more users to your site.
1. Enable SSL on Your Website
Google’s John Mueller said about SSL in the past,
“We see it as a positive signal if you can move to HTTPS”.
"SSL is important wherever sensitive information is transmitted – passwords, payment information etc. But beyond that, having HTTPS on your site is simply a good practice – it’s more secure for users browsing your content, and it helps Google to better understand your site’s content."
In December 2014, Google began to reward secure websites by giving them an advantage over non-secure sites when it comes to ranking.
It’s crucial to migrate your website to the HTTPS protocol to maintain your search rankings. Failure to do so may result in a significant loss of ranking position.
For non-technical bloggers and marketers, using a plugin can simplify the process. Here’s a plugin recommendation to make the migration to HTTPS easier:
Here is the quick method to install Free SSL on your website:
Here are the steps to install the ‘Really Simple SSL’ plugin for WordPress:
- Log in to your WordPress site.
- Go to the ‘Plugins’ directory.
- Search for ‘Really Simple SSL.’
- Download and activate the plugin.
- You’re all set!
Once activated, you can monitor your progress by checking the dashboard, which displays the number of pages secured with an SSL certificate. This plugin makes the migration process to HTTPS protocol easy and hassle-free.
2. Have Only One Version of Your Domain

It’s common for websites to have multiple versions, such as digitcrafter.com and www.digitcrafter.com
However, search engines like Google treat each version as a separate website.
To ensure that all versions of your site are redirected to a single version and prevent a split in link juice and traffic, follow these steps:
- Go to your DNS records.
- Use Type A as ‘@’.
- Add ‘@’ as the value for the ‘www’ name.
By doing this, all versions of your site will be redirected to the same version. This will help you avoid losing traffic and page ranking in search results due to multiple versions of your site.
3. Configure Permalink Correctly
Permalinks are used to direct users to specific areas on your website. The structure of your website’s permalinks can significantly affect your SEO rankings and visibility.
Many website owners are not aware that permalinks can be changed if necessary. Changing permalinks properly can have a positive impact on your website’s search engine rankings and overall visibility.
Incorrectly configured permalinks can lead to duplicate content issues, which can ultimately result in lower search engine rankings for your site.
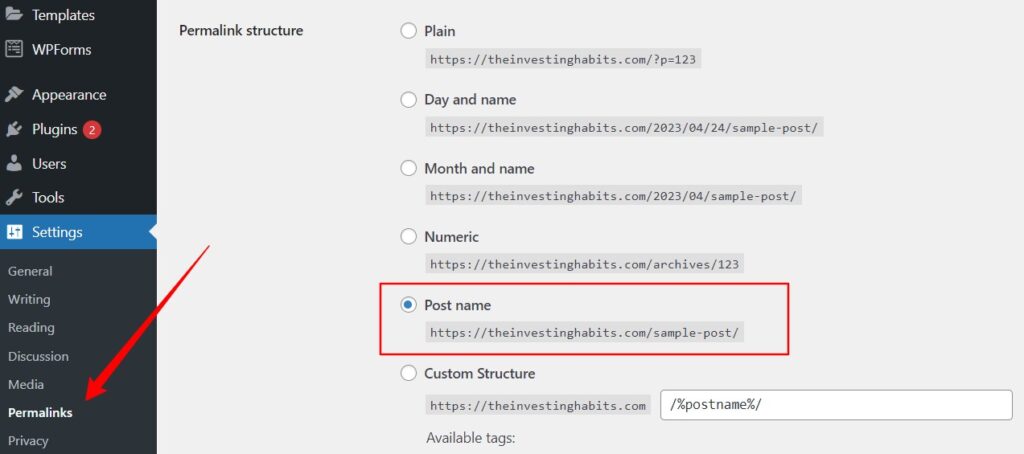
To configure permalinks on your WordPress blog or website, follow these steps:
- Go to the ‘Settings’ section in your WordPress dashboard.
- Click on ‘Permalinks’.
- Choose the ‘Post Name’ option.
It’s important to ensure that all the URLs on your site have a clean structure. Avoid links like:
Instead, use URLs like: https://digitcrafter.com/make-passive-income-online/
On WordPress, changing permalinks is a straightforward process.
To change your permalinks, navigate to the “Permalinks” option under “Settings.” From there, select “Post name” as your preferred permalink structure. This will help improve the structure of your URLs, making them more user-friendly and easier for search engines to understand.
4. Analyzing Google Analytics (Technical SEO Checklist)
Connecting your website to Google Analytics is not a direct part of technical SEO, but it’s a vital step to monitor your website’s traffic and visitor sources. With the data collected, you can identify and address any technical SEO issues that may be affecting your website’s performance.
To connect your WordPress site to Google Analytics, follow these steps:
- Go to the Plugins section in your WordPress dashboard.
- Search for the “MonsterInsights” plugin and install it.
- Activate the plugin and connect it to your Google Analytics account.
- Alternatively, you can also use the Google Site Kit plugin to connect your site to Google Analytics.
Remember to add your website to Google Analytics before connecting it to WordPress to get accurate data. There are also other user friendly Analytics provider Websites such as https://websiteanalytics.com that offer free platform to analyze your website metrics like Page Views, Visitors, Country and Cities wise analytics, Real Time Visitor information, Behaviors, Acquisitions, and many more.
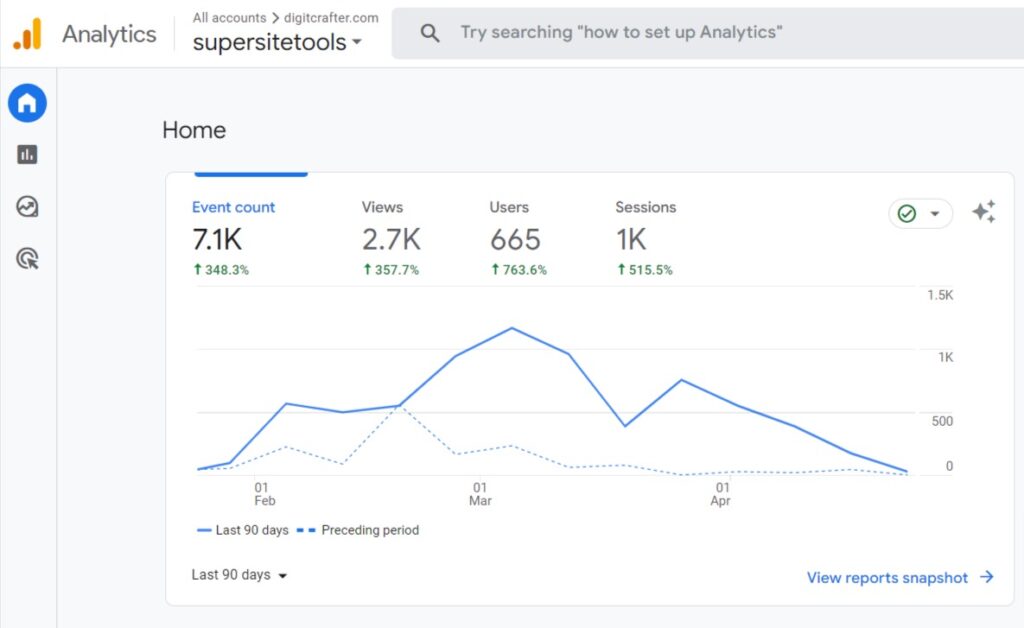
Just to clarify, adding a new property in Google Analytics is the first step to connecting your site to Google Analytics. Here are the detailed steps to add a new property:
- Go to Google Analytics and sign in with your Google account.
- Click on the “Admin” tab at the bottom left of the screen.
- Under the “Property” column, click on “Create Property”.
- Choose “Website” as the property type and fill in the required details such as website name, URL, industry category, and time zone.
- Click on “Create” to create your new property.
- You will be given a unique tracking code that you need to copy and paste into your website’s header code. This will allow Google Analytics to track your website’s traffic.
After setting up the new property, as i mentined above you can install a plugin like MonsterInsights or Google Site Kit on your WordPress website to easily connect it to Google Analytics.
5. Indexing Your Website in Search Engines (Google, Bing, Yandex)
Search engine indexing is the process of a search engine like Google or Bing, collecting and organizing information from web pages to create a searchable index for their users. This process involves crawling a website and gathering information about its pages and their content, including keywords, titles, images, and links.
The search engine then analyzes and ranks the pages in the index, based on their relevance and authority, to deliver the most relevant search results to users.
Indexing is essential for search engines because it allows them to quickly and efficiently process and deliver relevant search results to their users. Without indexing, search engines would have to manually review each website and its content, which would be an incredibly time-consuming process. Additionally, indexing allows search engines to provide users with up-to-date information by regularly crawling and re-indexing websites. Therefore i recommed to add your site in search engine consoles.
To add your website to Google Search Console, follow these steps:
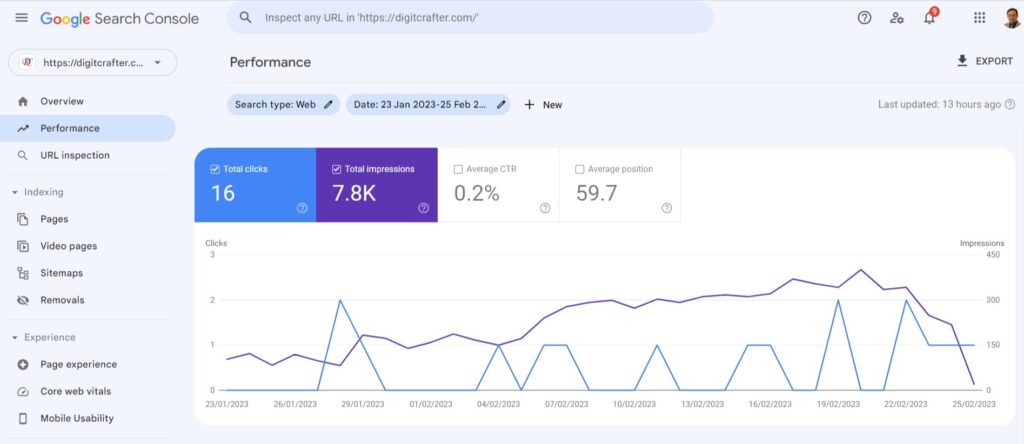
- Go to Google Search Console and sign in using your Google account.
- Click on the “Add Property” button on the top right-hand side of the page.
- Enter your website URL in the box provided and click “Add.”
- Verify ownership of your website by following the verification steps provided. You can verify ownership by adding a code snippet to your website or by uploading a verification file to your website.
- Once you have verified ownership, you can start using Google Search Console to monitor and optimize your website’s performance in Google search results.
To add your website to Bing Webmaster Tools, follow these steps:
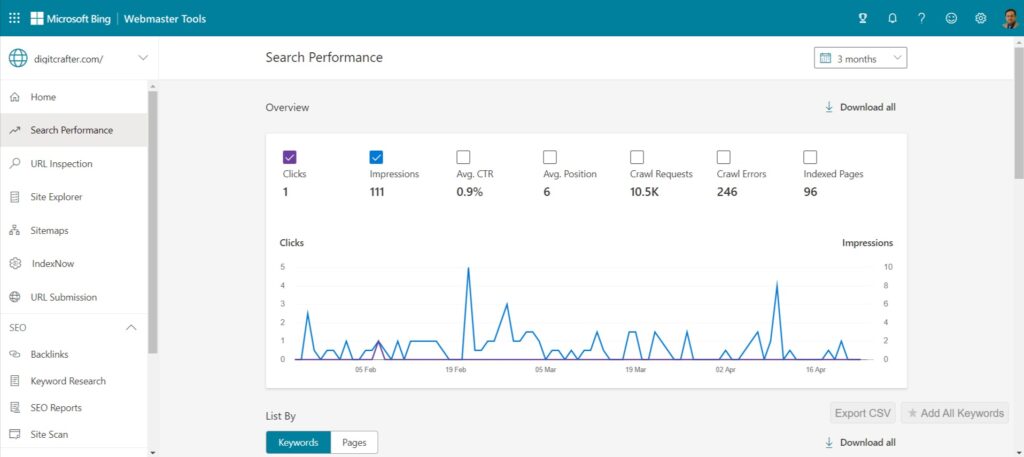
- Go to Bing Webmaster Tools and sign in using your Microsoft account.
- Click on the “Add Site” button on the top right-hand side of the page.
- Enter your website URL in the box provided and click “Add.”
- Verify ownership of your website by following the verification steps provided. You can verify ownership by adding a code snippet to your website or by uploading a verification file to your website.
- Once you have verified ownership, you can start using Bing Webmaster Tools to monitor and optimize your website’s performance in Bing search results.
6. Ensure Your Site is Responsive & Mobile-Friendly
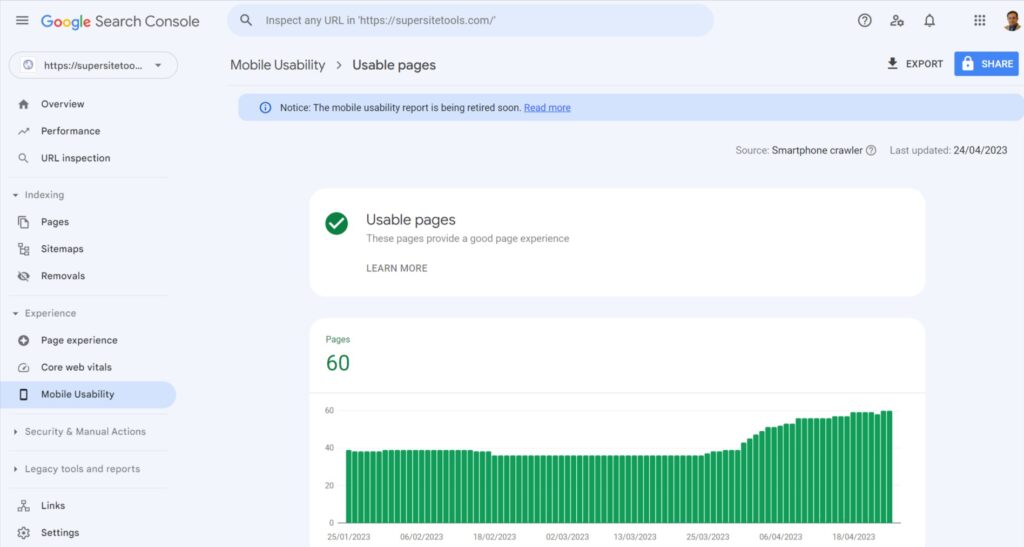
Mobile devices are increasingly being used to access websites, surpassing traditional desktop usage. Therefore, it is essential to ensure that your website is mobile-friendly, or you risk losing a significant amount of traffic from users who access websites on their phones or tablets. Test your website on different devices and make sure it’s responsive.
7. Adding Social Media Sharing Icons/Buttons

It’s not mandatory to have social media sharing buttons on your website for technical SEO purposes. However, including them can benefit your website by increasing social signals and user engagement. I am already using it on most of my projects, you can check its implementation on my other website https://supersitetools.com Social shares can also aid in building links back to your site, which can have a positive impact on its search engine rankings. To add social media sharing buttons, you can search for and install social sharing plugins, as there are many options available.
8. Fix Broken Internal and Outbound Links

Ensure your website is user-friendly and free of any broken links that may hinder visitor experience.
Keep a keen eye out for pages that cannot be accessed by visitors or redirect to an undesirable location.
These pages include:
- 301 or 302 redirects
- 4XX error pages
- Orphaned pages that have no interlinking.
To help identify these pages and ensure smooth user experience, take advantage of the Super Site Tools. The SuperSiteTools efficiently crawls through your website to identify and highlight all broken links, both internal and outbound.
9. Remove Duplicate Content (Technical SEO Checklist)

As an SEO expert, it’s important to avoid duplicate content issues. Having multiple versions of your site can be problematic because search engines like Google will view them as separate websites. To prevent this, you should choose one version and redirect all others to it.
To avoid content duplication issues, consider the following four strategies:
- Avoid creating content on the same keyword.
- Redirect duplicate content to the canonical URL.
- Don’t publish the same content that’s already on your site.
- Add a canonical link element to the duplicate page.
It’s also crucial to ensure that all your blog posts rank for different keywords. Otherwise, Google may view them as duplicate content. By implementing these strategies, you can prevent duplicate content issues and improve your site’s SEO performance.
10. Ensure Your Site Has Optimized XML Sitemap

If you want your website to rank higher on search engines, then having an optimized XML sitemap is an absolute must. This critical element helps search engine crawlers discover all of your site’s pages and content, making it easier for them to index and rank your site.
To ensure that your site’s XML sitemap is optimized, make sure that each page on your site has its URL included in the XML sitemap file. If you have a WordPress site, you can improve the XML sitemap by having dynamic URLs from your blog included as well. To generate an XML sitemap, I prefer to use an online tool such as SuperSiteTools.com
By ensuring that your site has an optimized XML sitemap, you’ll be providing search engines with all the information they need to effectively crawl and index your site. This will result in increased visibility and traffic to your site, ultimately leading to more conversions and revenue for your business.
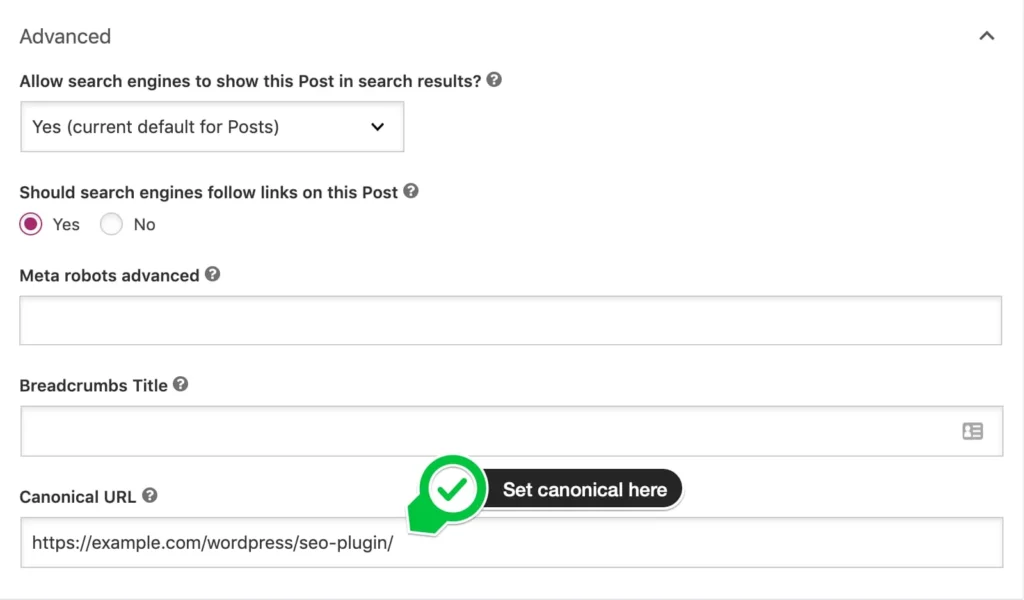
Use Canonical Tags on Your Pages
Canonical tags act as a guide for search engines, indicating which pages contain identical content. By using these tags, you can tell search engines that two pages with different URLs have the same content, avoiding any confusion that may negatively impact your SEO efforts.
For effective technical SEO, it’s crucial to ensure that Google understands your website’s architecture and crawl efficiency. Adding canonical tags is a simple yet essential step towards achieving this goal.
If you’re using WordPress, adding canonical tags can be done effortlessly with the help of Yoast or by manually editing your theme’s header.php file. Don’t overlook this crucial step in your technical SEO checklist.
12. Optimize Image File Names and Sizes
One of the often overlooked aspects of SEO is properly naming and sizing your images. To ensure that search engine crawlers can effectively index your images, it’s crucial to give them clear and descriptive names that accurately reflect their content.
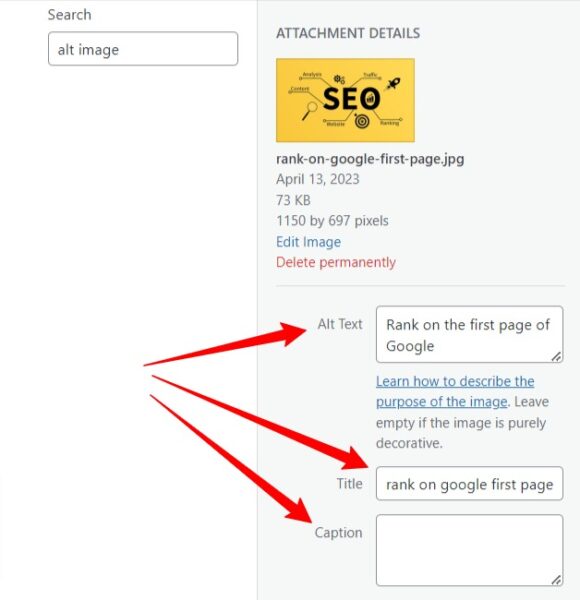
Moreover, resizing your images to an appropriate size helps in improving page speed and the user experience on your website. Additionally, changing the file extension of your images can also have a positive impact on your website’s search engine rankings. The two most popular file formats for images are PNG and WebP. While WebP is more widely supported across search engines.
However, it’s not just the file names and sizes that you need to focus on. Alt tags and descriptions for images also play a significant role in SEO. These provide valuable context to search engines and help them understand the content of your images. By adding descriptive and relevant alt tags and descriptions, you can make your images more accessible and increase their chances of ranking higher in search results.
Last but not least, taking the time to properly name, size, and describe your images can greatly benefit your website’s SEO. By optimizing your images for search engines, you can enhance the user experience on your website and drive more traffic to your content.
13. Correctly Specify Your Robots.txt File
As you work on optimizing your website, don’t forget about the importance of the robots.txt file. This file is a critical component of the technical SEO checklist because it informs search engine bots about which areas of your site are open for crawling.
To ensure that each page of your site can be accessed by crawlers, it’s essential to specify the robot’s file. This will help search engines understand your site structure and ensure maximum crawl efficiency.
Luckily, adding and editing the robots.txt file is a simple process. You can use popular plugins like RankMath or Yoast to do it automatically, or follow the clear instructions provided by Google to make changes manually. With a well-optimized robots.txt file, you’ll be well on your way to improving your site’s search engine visibility and driving more traffic to your content.
14. Implement of Schema Markup
Schema Markup is a crucial element in enhancing the search engine optimization of your website. Essentially, it is a form of microdata that can be incorporated into your pages to help search engines better understand the content on your site. By including Schema Markup, you can give search engines more detailed information about your website’s content, allowing them to display more accurate and informative results in the search engine results pages.
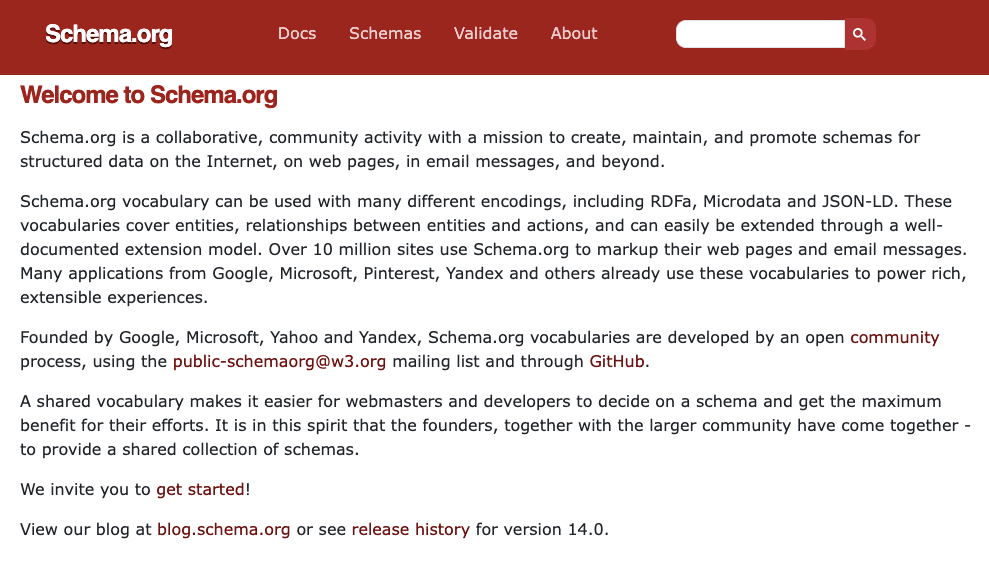
The Schema Markup library available on https://schema.org/ is vast and covers a wide range of topics, from video content to product reviews. So, regardless of the type of content you have on your site, there’s a good chance that you’ll be able to find relevant Schema Markup to incorporate into your pages. Ultimately, Schema Markup is a powerful tool that can help you improve your search engine rankings and provide a better user experience for your
15. Remove Unnecessary Plugins
If you’re using WordPress to manage your content, it’s important to keep in mind that each plugin can actually have an impact on your SEO.

Why is that? Well, each plugin adds a collection of code to your site which can slow down your site and make other changes.
For instance, plugins like ShareThis and AddThis could potentially harm your technical SEO checklist since they use inline scripts to share a link on your page, which can directly affect the load speed of your webpage. So be mindful of the plugins you’re using and how they might be affecting your site’s performance!
Final Words
I have put together a comprehensive technical SEO checklist that you can apply to your WordPress website. Whether you’re a newbie or a non-techie, you’ll find this checklist easy to follow and implement.
In case you have any queries, feel free to drop your questions in the comments section below. I’ll be more than happy to assist you.


Your insights always provide a fresh perspective. Much appreciated!
Thanks
I came across this article and discovered it to be an excellent source. Thank you for sharing!
you’re welcome